How to Enable SSH Service on Xiaomi Router AX3000 for Customization
Background:
A Prometheus+Grafana monitoring system has recently been established in the test environment, and there’s a growing need to include the router in this monitoring setup. To achieve this, enabling SSH on the Xiaomi router is essential for further configuration.

Preparation:
1. A Xiaomi Router AX3000T
2. The IP address (management page) and login credentials of your Xiaomi router
3. A computer connected directly to the router’s LAN port via an Ethernet cable
Steps:
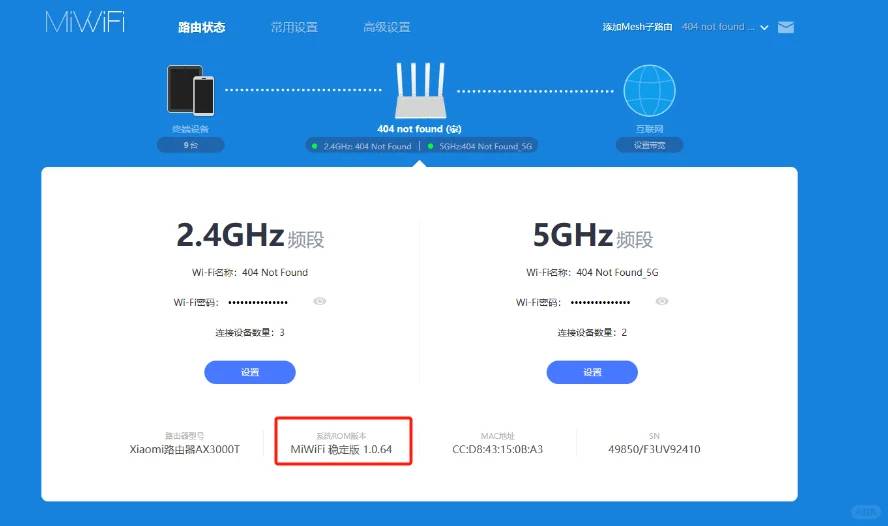
1. **Access the Router Management Page**
Begin by logging into the management interface of your Xiaomi router. Once inside, verify the current firmware version installed on your device. This step ensures compatibility with the tools you’ll be using later.
2. **Check Firmware Compatibility**
Cross-reference the router’s firmware version with the supported versions listed in the official documentation or table. If your router’s firmware matches the required version for your region, you can proceed without needing to update it. This saves time and minimizes potential risks associated with upgrading firmware.
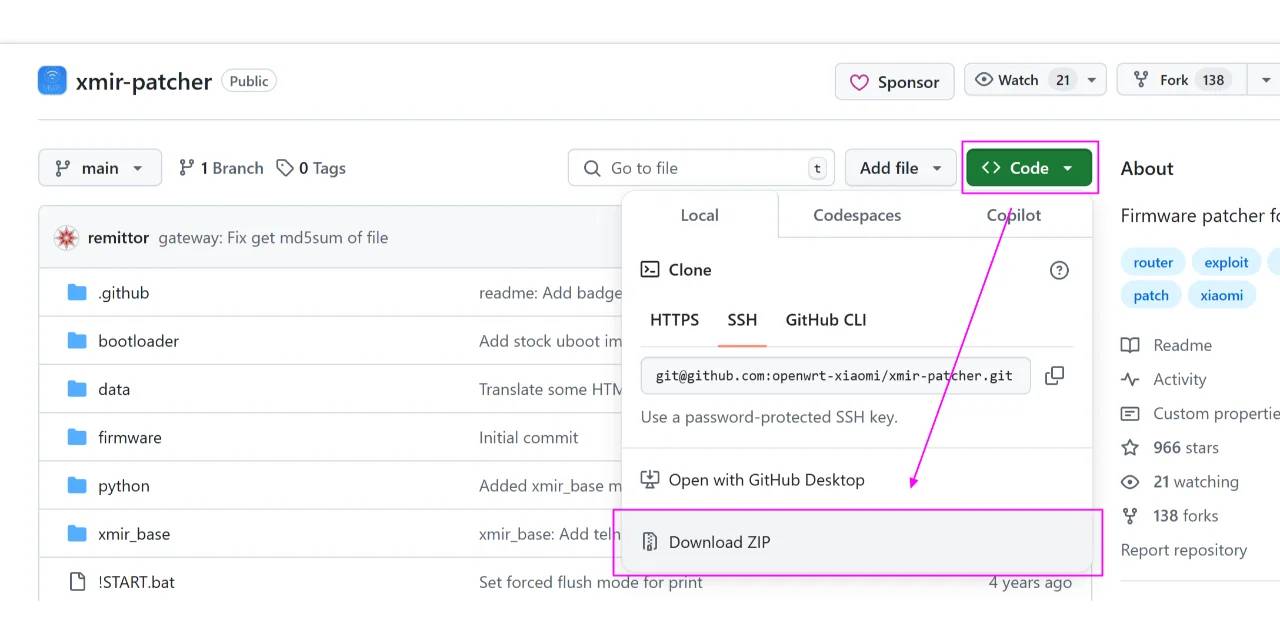
3. **Enable SSH Using xmir-patcher**
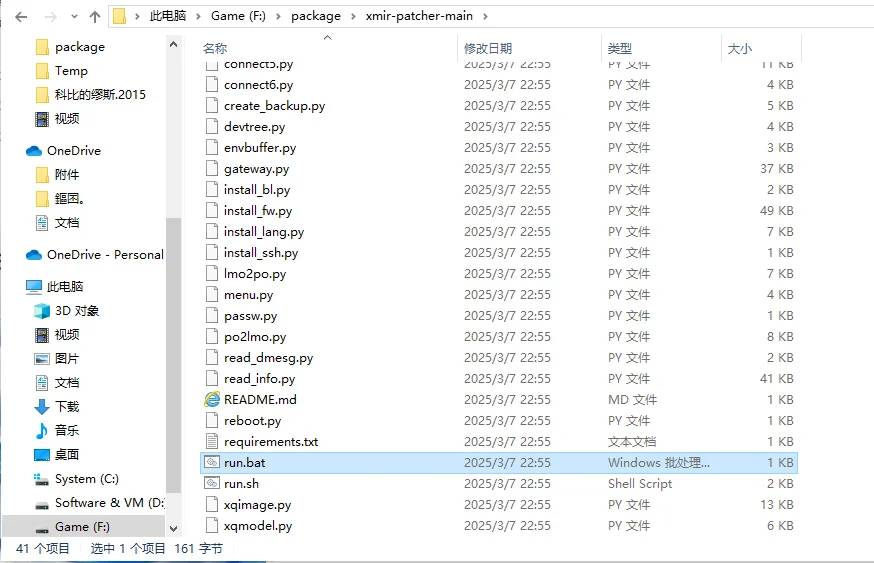
Download the powerful **xmir-patcher** tool designed specifically to unlock SSH functionality on Xiaomi routers. You can find it at [this GitHub repository](https://github.com/openwrt-xiaomi/xmir-patcher). After downloading, extract the compressed file to access its contents.
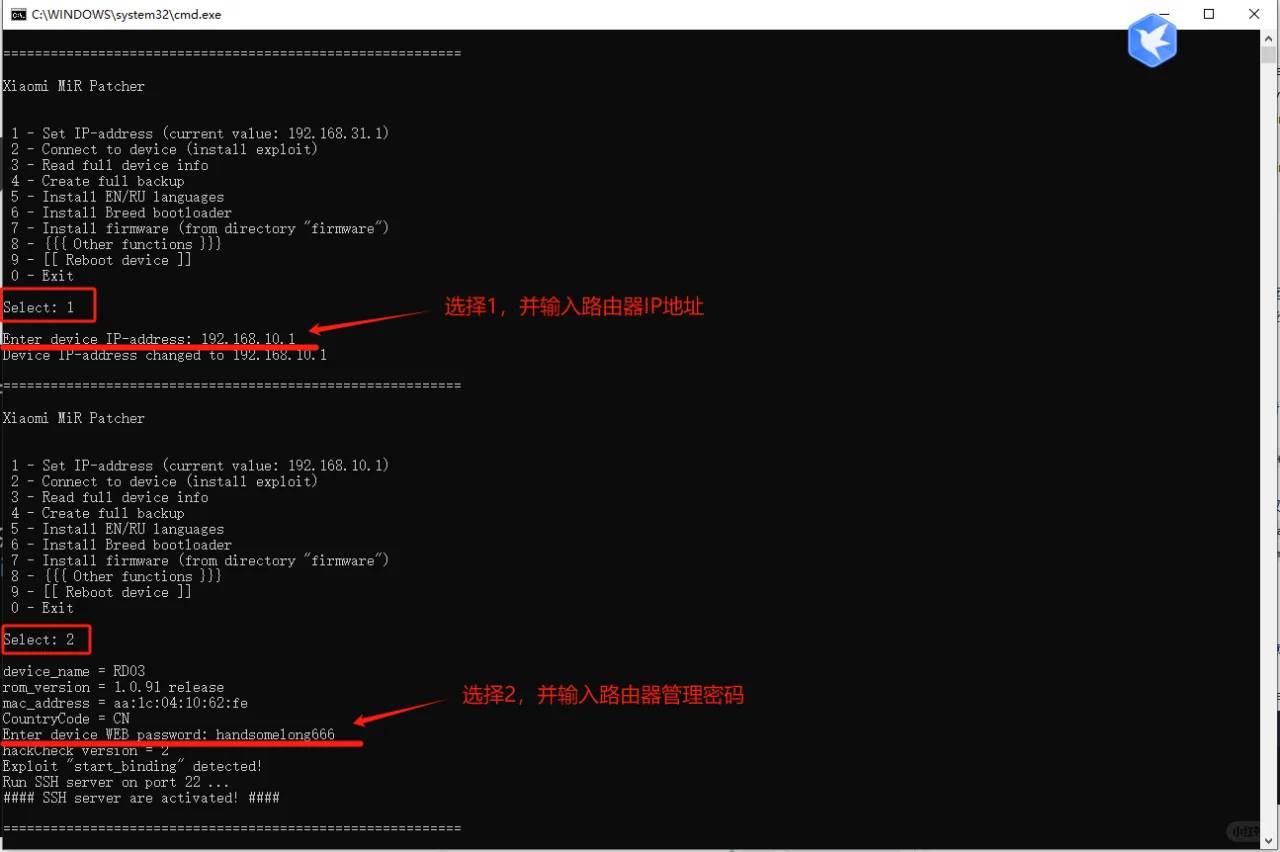
– On Windows: Right-click the `run.bat` file and select “Run as Administrator” to initiate the process.
– On macOS: Simply double-click the `run.sh` file to start the script.
Follow the on-screen instructions and refer to the accompanying images if needed to complete the setup seamlessly.
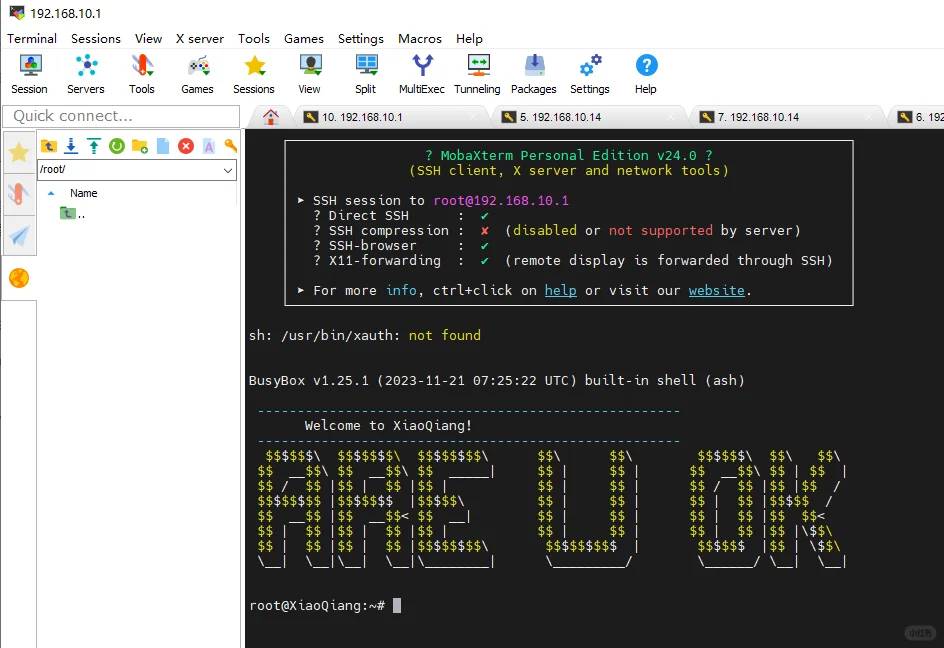
4. **Verify SSH Access**
Open an SSH terminal and attempt to log in. If the message “ARE U OK” appears, congratulations! You’ve successfully enabled SSH on your Xiaomi router and are now ready to integrate it into your monitoring system.
This guide is super helpful! I didn’t realize it was this straightforward to enable SSH on the Xiaomi router. I’ll definitely try this out to integrate my router into the monitoring setup. It’s great that you included all the necessary prep steps too.
This guide will definitely come in handy since I’ve been looking into adding my Xiaomi router to our monitoring system. Enabling SSH access seems straightforward enough, but I’m curious if there are any security considerations I should keep in mind while following these steps. It’s great that you included all the necessary prep details like the IP address and Ethernet connection. I’ll give it a try soon and let you know how it goes!
This guide is super helpful! I didn’t realize it was this straightforward to enable SSH on the Xiaomi router. I’ll definitely try this out to integrate my router with the monitoring system. Good job explaining each step clearly!
This is really helpful! I didn’t realize it was that straightforward to enable SSH on the Xiaomi router. I’ll definitely try this out to integrate my router into the monitoring setup. Just wondering if there are any additional security considerations afterward.
This guide is super helpful! I’ve been wanting to monitor my AX3000’s performance in Grafana too, but didn’t know where to start with SSH. Just one question – does this method work after firmware updates or do we need to re-enable SSH each time?
Great to hear you found the guide useful! Unfortunately, firmware updates typically reset SSH access, so you’ll need to re-enable it after each update. I’d recommend documenting your steps to make the process quicker next time. Personally, I wish Xiaomi would make this more persistent too!
This guide is super helpful! I’ve been wanting to monitor my AX3000’s performance in Grafana but didn’t know where to start with SSH access. The Ethernet cable tip is smart – I always forget wired connections are more stable for these setups. Gonna try this tonight!
This guide is super helpful! I’ve been wanting to monitor my AX3000’s performance in my homelab setup too. Just one question – does enabling SSH void the warranty on these routers? Might be worth mentioning for cautious users like me.
Great tutorial! I’ve been wanting to monitor my AX3000’s performance in my homelab setup too. Just one question – does enabling SSH void the warranty, or is it reversible if needed? The Ethernet cable tip is smart, I always forget wired connections are more stable for this stuff.
Thanks for your kind words! Enabling SSH technically voids Xiaomi’s warranty, but the process is fully reversible by performing a factory reset. I agree – wired connections make a world of difference for stability, especially when tinkering with router settings. Happy homelabbing!
This guide is super helpful! I’ve been wanting to monitor my AX3000’s performance in my homelab but didn’t know SSH access was possible. Just curious – have you tested if these steps work after a firmware update, or do we need to re-enable SSH each time?
This guide is super helpful! I’ve been wanting to monitor my AX3000’s performance but didn’t know SSH access was possible. Just curious – have you noticed any stability issues after enabling SSH? Might try this over the weekend.
This guide is super helpful! I’ve been wanting to monitor my AX3000’s performance but didn’t know SSH access was possible. Just curious – have you tested if these steps also work on the international version of the router?
Great to hear you found the guide useful! While I’ve primarily tested this on the Chinese firmware version, several users have reported success with international variants too—just be aware that minor command differences might exist. I’d recommend checking your firmware version first to be safe. Thanks for bringing this up!
This guide is super helpful! I’ve been wanting to monitor my AX3000’s performance in my homelab but didn’t know where to start with SSH access. The Ethernet cable tip is smart – I almost tried doing it over WiFi at first. Gonna try this tonight!
This guide is super helpful! I’ve been wanting to monitor my AX3000’s performance but didn’t know SSH access was possible. Just one question – does this method work after firmware updates or do we need to re-enable SSH each time?
Great question! Unfortunately, firmware updates typically reset SSH access, so you’ll likely need to re-enable it after each update. I’d recommend checking back after major firmware releases, as Xiaomi sometimes changes how these settings work. Personally, I keep a note of the steps handy for quick reconfiguration. Thanks for your kind words about the guide!
Great guide! I’ve been wanting to add my router to my existing monitoring setup but wasn’t sure how to enable SSH on the AX3000. The step-by-step instructions look straightforward, especially the part about the direct Ethernet connection—definitely trying this later.