How to Calibrate Redmi 4K Monitor A27U with Detailed Parameters for Best Display
🎉 Finally, I had some free time during the holidays to align the color settings between my Redmi A27U and Mac! 🎉

Previously, all the guides I found online were for the older Redmi 27NU models. 😅 The built-in parameter modes are completely different and don’t apply to the A27U. I was totally confused and even thought I might have bought the wrong monitor! 😂 Eventually, after spending some time tweaking it myself, I got a result that looks pretty good. So, I’m sharing it here for everyone’s reference!
—
🌟 **Step 1:** Connect your Redmi A27U to your Mac using the monitor’s built-in Type-C cable. Then, plug in the power cord and turn it on.
—
🌟 **Step 2:** Adjust the settings on your Mac desktop to configure both displays.
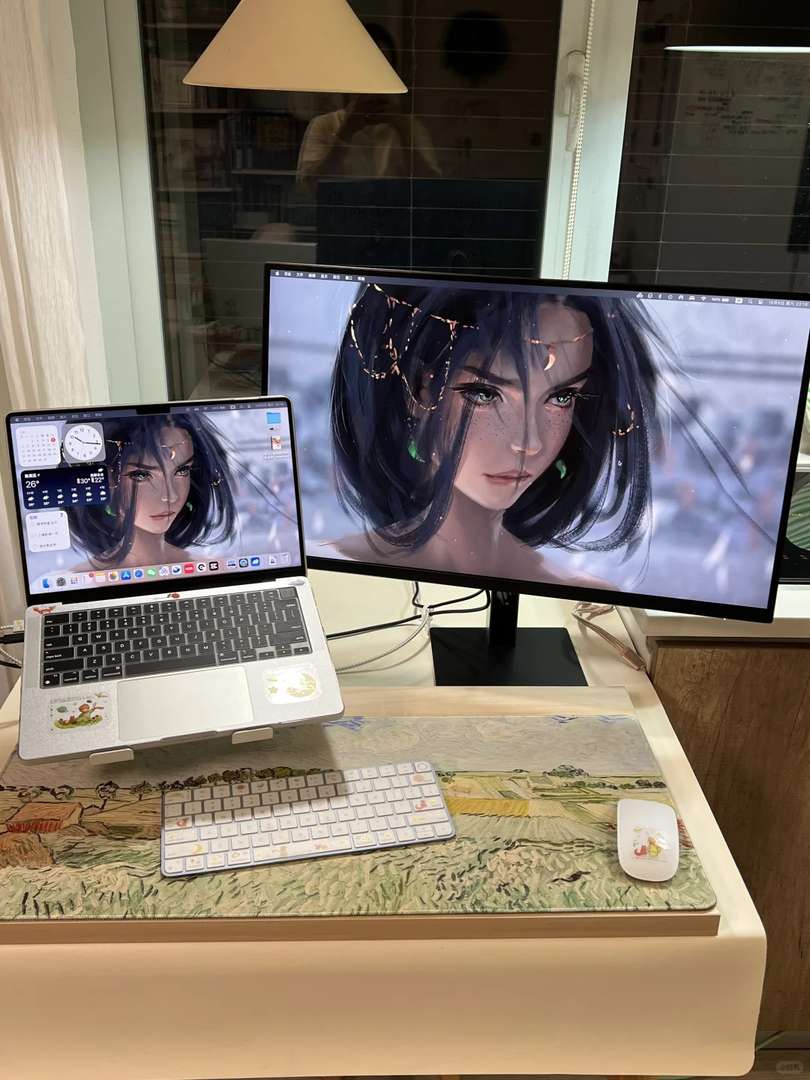
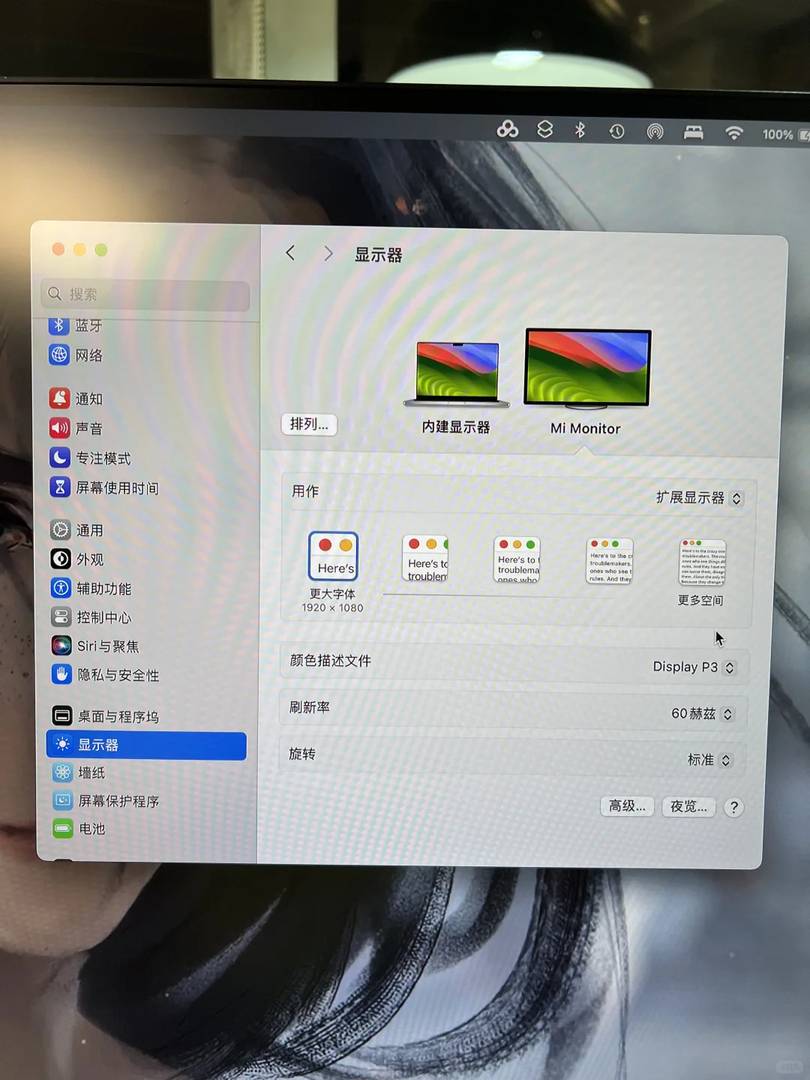
🍎 **For the Mac internal display:**
– Preset: Apple Display (P3-600nits)
– Refresh Rate: ProMotion
– Turn off “True Tone” while calibrating—it makes the process easier. Once everything is set, you can turn it back on if desired.
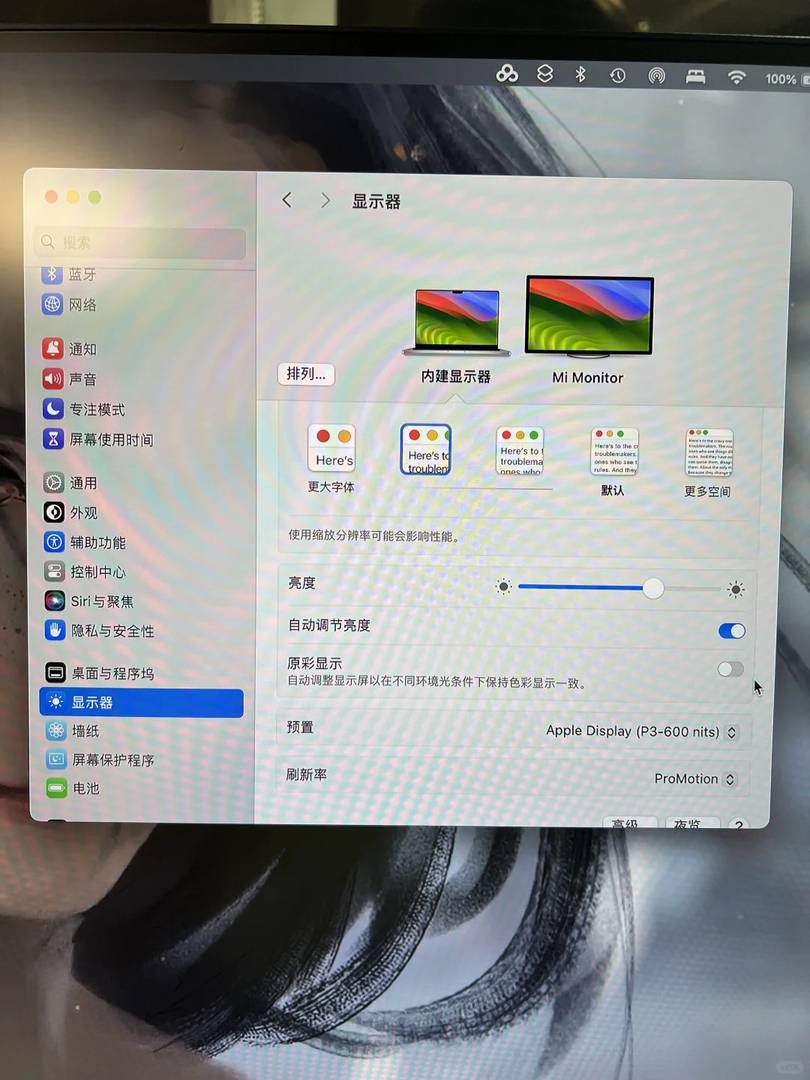
🚀 **For the Redmi external display:**
– Font Size: Larger Text
– Color Profile: Display P3
– Refresh Rate: 60Hz
– Orientation: Standard
—
🌟 **Step 3:** Fine-tune the internal settings of the Redmi A27U monitor.
🌸 **(Note:** The power button and calibration button are the same, located on the lower-right back side of the monitor—check the last photo for reference.)
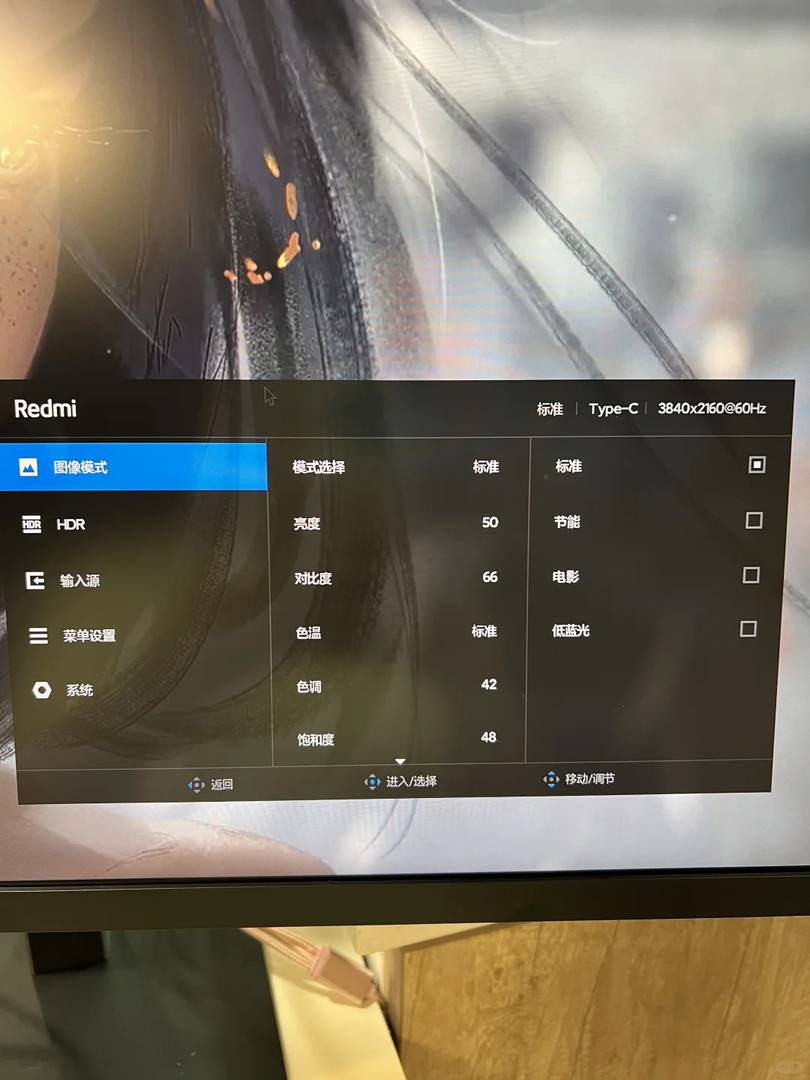
🖼️ **Image Mode:** Standard
🔆 **Brightness:** 50 (adjust to 80 during daylight hours)
◐ **Contrast:** 66
🌡️ **Color Temperature:** Standard
🌈 **Hue:** 42 (adjust to 46 during the day)
💧 **Saturation:** 48 (adjust to 50 during the day)
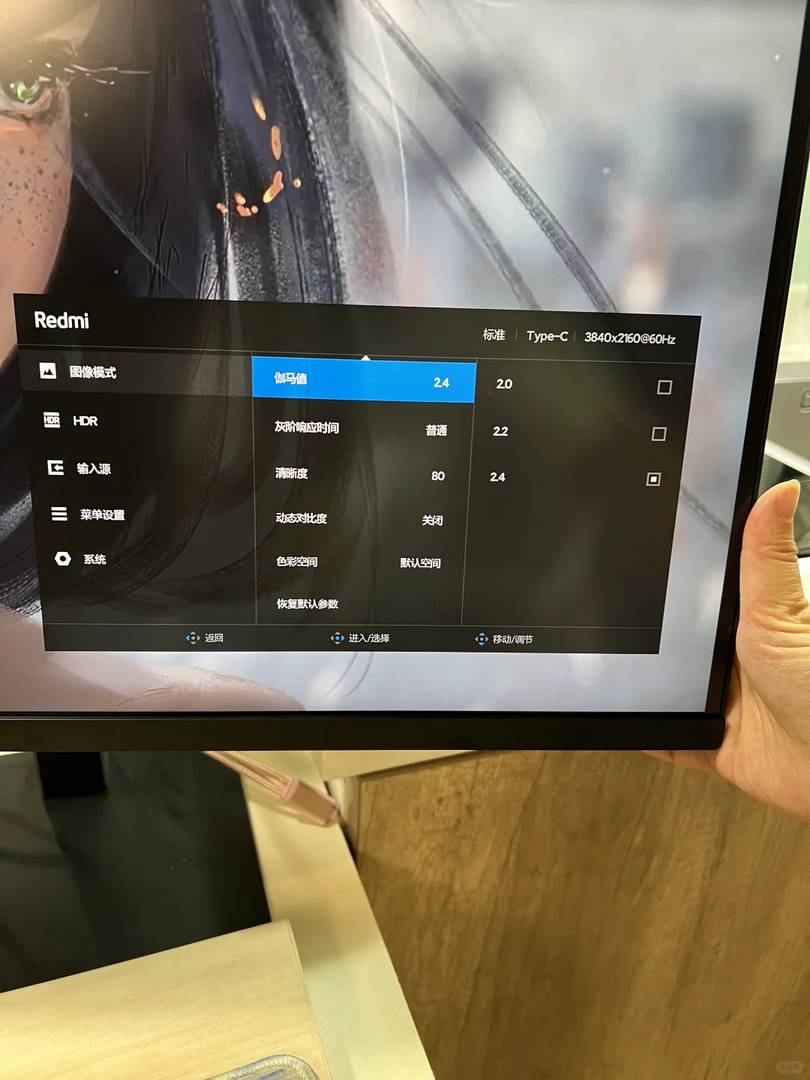
⭐ **Gamma Value:** 2.4
🌿 **Gray Response Time:** Normal
🔪 **Sharpness:** 80
🌿 **Dynamic Contrast:** Off
🌿 **Color Space:** Default
—
🌸 **Pro Tip:** The Redmi monitor doesn’t automatically adapt to ambient brightness, so it’s best to make two sets of adjustments—one for night and one for day:
– **Nighttime (dim lighting):** Set brightness to 50, hue to 42, and saturation to 48.
– **Daytime (bright lighting):** Increase brightness to 80, adjust hue to 46, and saturation to 50.
—
🥳 That’s it! These are my personal tips for calibrating the colors on the latest Redmi 4K monitor. I hope this helps anyone else who’s just gotten their hands on a Redmi monitor! 🌟
I just got the Redmi A27U myself and this calibration guide is a lifesaver! The differences between the 27NU and A27U are definitely confusing. I especially appreciate the detailed steps for adjusting the gamma and color temperature. Now my monitor looks so much better!
Oh man, I totally feel your struggle with those outdated guides! Just got my A27U last week and was going crazy trying to match colors with my Windows PC. Your post saved me hours of trial and error – especially the part about the gamma settings!
Oh man, I totally feel your struggle with the outdated guides! I’ve been wrestling with my A27U’s colors for weeks thinking I was missing something. Your settings breakdown is a lifesaver – finally my design work looks consistent between screens. Might tweak the brightness a bit for my darker room though.
Glad our guide helped solve your color consistency issues! Adjusting brightness for your darker workspace is a smart move—I often recommend keeping it around 120 cd/m² in low-light environments. Thanks for sharing your experience, and happy designing!
Oh man, I totally feel your struggle with the outdated guides! I’ve been trying to calibrate my A27U for ages and gave up until I saw this. Your settings saved me so much time—finally my design work looks accurate!
So glad our guide helped you nail the calibration—accurate colors make all the difference for design work! It’s awesome to hear you’re finally happy with the display after the frustration of outdated tutorials. Thanks for sharing your experience—it’s feedback like this that keeps us motivated!
Oh man, I totally feel you on the struggle of finding the right settings for the A27U! I just got mine last week and was going crazy trying to match it with my Windows PC. Your color temperature tip made a huge difference – finally looks accurate now!
Oh man, I totally feel your struggle with the outdated guides! I’ve been trying to calibrate my A27U for ages and kept getting frustrated with those 27NU settings. Your post finally gave me some hope—gonna try your tweaks tonight!
Glad I found this guide! I’ve been struggling with my A27U’s colors looking off next to my MacBook—those old 27NU tutorials definitely don’t cut it. Your settings saved me so much trial and error time!
Oh man, I was struggling with the exact same issue last week! The A27U’s settings are so different from the older models, and your calibration tips saved me hours of trial and error. The colors finally look perfect with my MacBook now.
Oh man, I totally feel your struggle with the outdated guides! I just got the A27U last week and was going crazy trying to find the right settings. Your post saved me so much time – those color tweaks made my Photoshop work look way more accurate now.
Glad to hear the guide worked well for your Photoshop projects! Those color settings were a game-changer for my design work too. Thanks for sharing your experience – it’s always rewarding to know the tweaks made a real difference for someone else. Happy calibrating!
Oh man, I was in the same boat trying to find settings for the A27U and thought I was going crazy. Your post is a lifesaver—finally some actual relevant numbers to try out. Gonna test these on my setup later today!