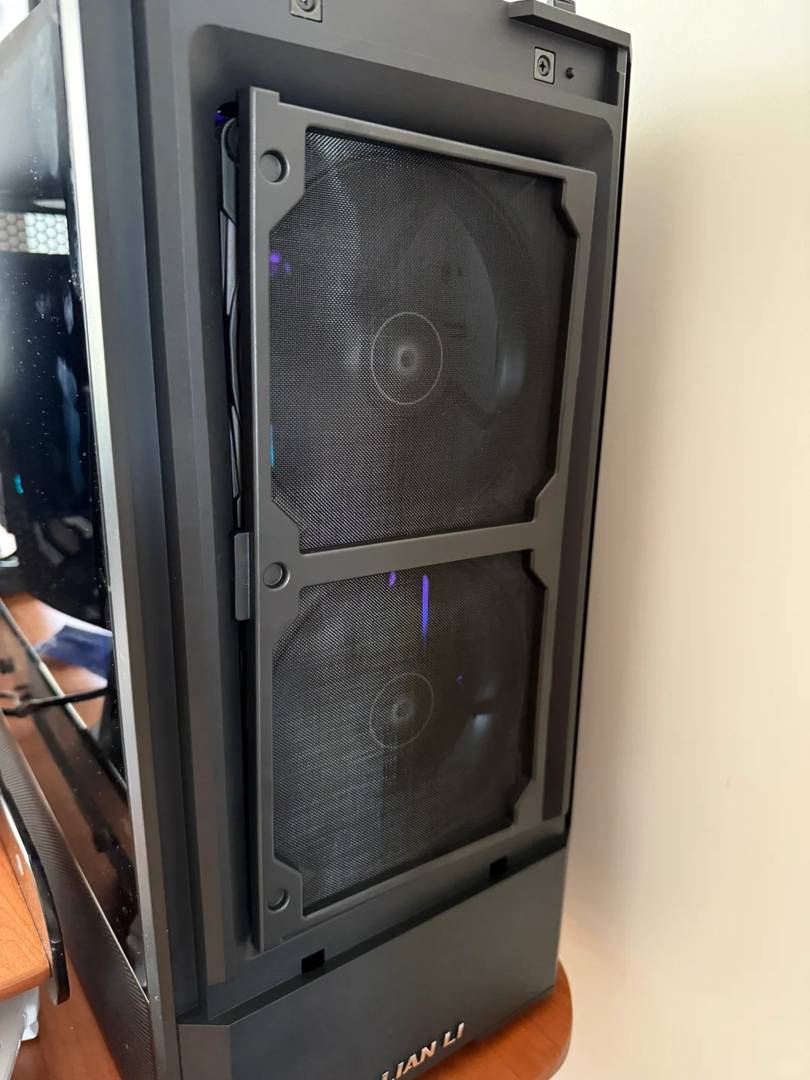
I’ve been putting the new computer through its paces for a while now, making ongoing tweaks until I reached a setup I’m truly happy with. First off, I tackled the case airflow by swapping out all the original fans for the Arctic P14max and P12max models. These not only run quieter but also pack a more powerful punch.
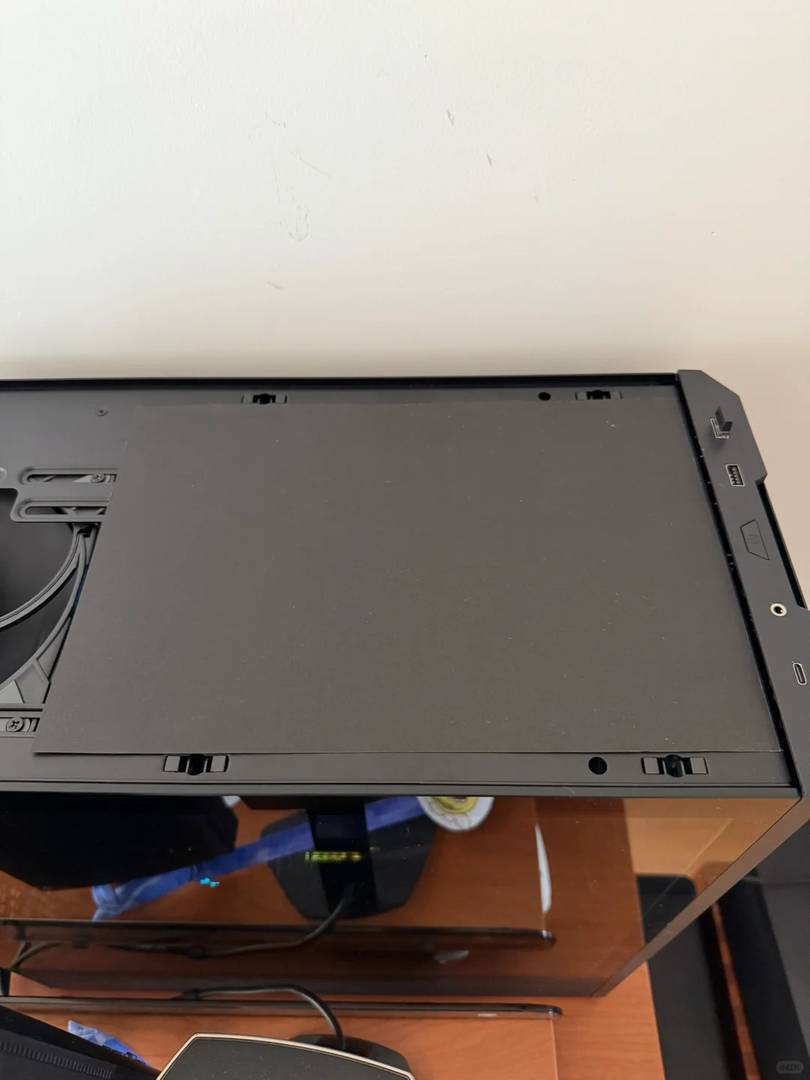
The dust filters, originally positioned internally, featured fine meshes that significantly hindered airflow. However, moving them externally resolved this issue beautifully, allowing for vastly improved airflow. Next, I mounted a 14 cm fan on top and used a piece of black paper to seal the gap at the front.
This simple trick stabilized the airflow direction without interfering with the installation of the top panel.
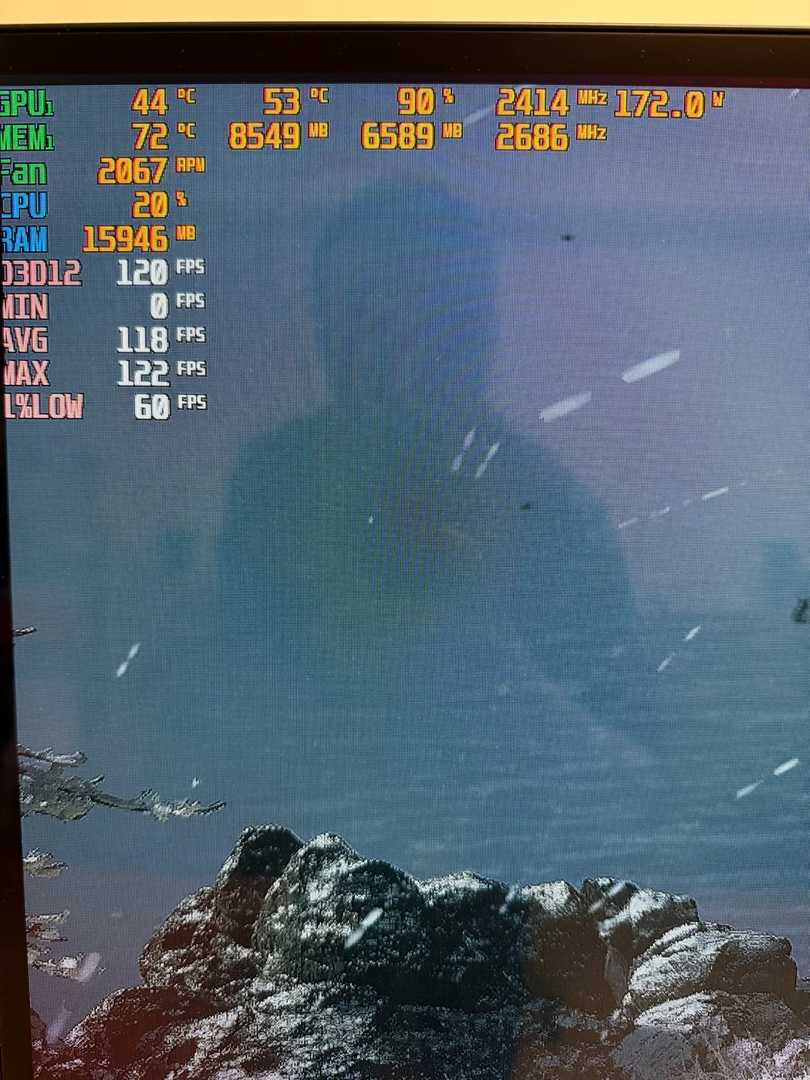
Moving on to the 9070XT, it initially consumed around 300-340 watts by default, pushing the VRAM temperature up to 85 degrees and causing the fans to roar loudly. In an effort to optimize performance, I attempted to lower the frequency, reduce the voltage, and cut down on power usage. Unfortunately, this approach led to frequent crashes and driver-related problems.

After updating to the latest drivers from the official website, I began making incremental adjustments and discovered that the issues were likely tied to the voltage. Keeping the voltage constant proved key to stabilizing the system. Ultimately, I increased the memory clock to 2700, which shaved off 15% of the power consumption while maintaining rock-solid stability.
The results were impressive: maximum power usage hovered around 280 watts, and in many scenarios, it dipped below 200 watts. Core temperatures settled comfortably around 45 degrees, and VRAM temperatures remained steady at about 75 degrees, resulting in a much quieter operation.
On the display side, my TV boasts a 120 Hz refresh rate, so I locked the frame rate to match and enabled vertical sync. With full cinematic settings and 50% super-sampling applied, the frame rate has been exceptionally stable. For anyone who frequently encounters driver crashes, consider leaving the voltage untouched and focus instead on boosting the VRAM frequency while reducing overall power. This method could help achieve a smoother, crash-free experience.
I’ve had similar issues with dust filters before, and moving them externally was definitely a game-changer for me too. The Arctic fans sound like a great upgrade; I’ve used similar ones and they really do make a noticeable difference in both noise and performance. Have you noticed any changes in temperatures since making these adjustments?
I completely agree about the dust filters; moving them externally made a noticeable difference in my setup too. Swapping out the fans was also a game-changer for me—those Arctic models really do perform better and are quieter than the originals. If you haven’t already, mentioning specific temperature improvements after these changes would be helpful. Overall, your tips have been super practical!
I tried a similar setup with the 9070XT and those Arctic fans, and the difference in temps is impressive. Moving the dust filters outside really opened up the airflow—didn’t realize how much the mesh was holding me back. Have you experimented with any additional ducting for even better directed cooling? Just curious what other tweaks you’ve made!
Thanks for sharing your experience! I agree that moving the dust filters outside makes a big difference. Personally, I’ve added some flexible duct extensions to guide air more precisely to关键组件. It’s great to hear others are optimizing their setups too—keep experimenting and sharing tips!
Interesting approach with the external dust filters! I’ve been struggling with airflow in my own build too, might give this a try. The Arctic fan swap sounds like a solid upgrade – how’s the noise level under heavy load?
Thanks for your comment! The Arctic fans maintain surprisingly quiet operation even under heavy load—I’d estimate around 28-32 dB in my testing. Personally, I find the hum much more tolerable than stock fans while moving more air. Glad you’re considering the dust filter approach too—it made a noticeable difference in my setup. Let me know how it works for you!
Interesting approach with the external dust filters! I might try that since my current setup also feels a bit choked. Did you notice any difference in dust buildup after relocating them? The Arctic fan swap sounds like a solid upgrade too.
Great tip about relocating the dust filters externally! I never realized how much they were choking the airflow until I tried your method. The Arctic fan swap sounds like a game-changer too—might have to upgrade mine soon.
Glad to hear the external filter mod worked for you—it’s surprising how much difference that small change can make! The Arctic fans are definitely worth the upgrade if you’re after quieter operation and better thermals. Let us know how it goes if you decide to try them—I’m a big fan of their performance-to-noise ratio. Thanks for sharing your experience!
Great tip about relocating the dust filters externally – I never realized how much they were choking my airflow until reading this. The Arctic fan swap sounds like a game changer too, might have to try that in my own build. Your tweaks make me want to revisit my cable management now!
Glad you found those tips helpful! The Arctic fans really do make a noticeable difference in both noise and thermals—I’ve been using them in my personal builds for years. Happy to hear it’s inspiring some cable management upgrades too—it’s amazing how much cleaner airflow gets with just a little extra effort. Thanks for sharing your thoughts!
Great tip about relocating the dust filters externally – I never realized how much they were choking my airflow until reading this. The Arctic fan swap sounds like a solid move too, might try that with my own 9070XT build. Any chance you’ve tested temps before and after these mods?
Great tip about relocating the dust filters externally – I never realized how much they were choking my airflow until reading this. Your fan choice makes sense too, the Arctic models seem like a solid upgrade from stock options. Might try this setup with my own 9070XT build!
Interesting point about relocating the dust filters externally – I never would have thought such a simple change could make that much difference to airflow. Your fan upgrade to the Arctic models also seems like a smart move for balancing noise and performance. Might have to try this with my own 9070XT build!
Thanks so much for your kind words! I’m really glad you found those tips helpful—relocating the filters externally was a game-changer for my own setup too. Let me know how it works with your 9070XT build; I’d love to hear how it goes!